Sunday, February 16, 2014

Scratch Built Goblin Chariot Part 2

More work on the gobbo chariot. As I worked, I learned the repercussions of going about a project in an ad-hoc fashion as I tend to do. While I made sketches and designs and pondered long for many hours, once the glue and blades meet plastic, one finds that things just aren't as easy as expected.


The old saying that goes "No plan survives contact with the enemy" is pretty much the rule to keep in mind when you're scratch building. I read lots of blogs with exhaustive pictures and plans, and while I'm sure some people are far more organized than I am, I expect that they also had much gnashing of teeth and wringing of hands that happened off-camera. Some of my favorite blogs are those that go into detail about not only what they did, but what they did wrong. I find that just as valuable - perhaps more so. 

Anyway, on with the progress.

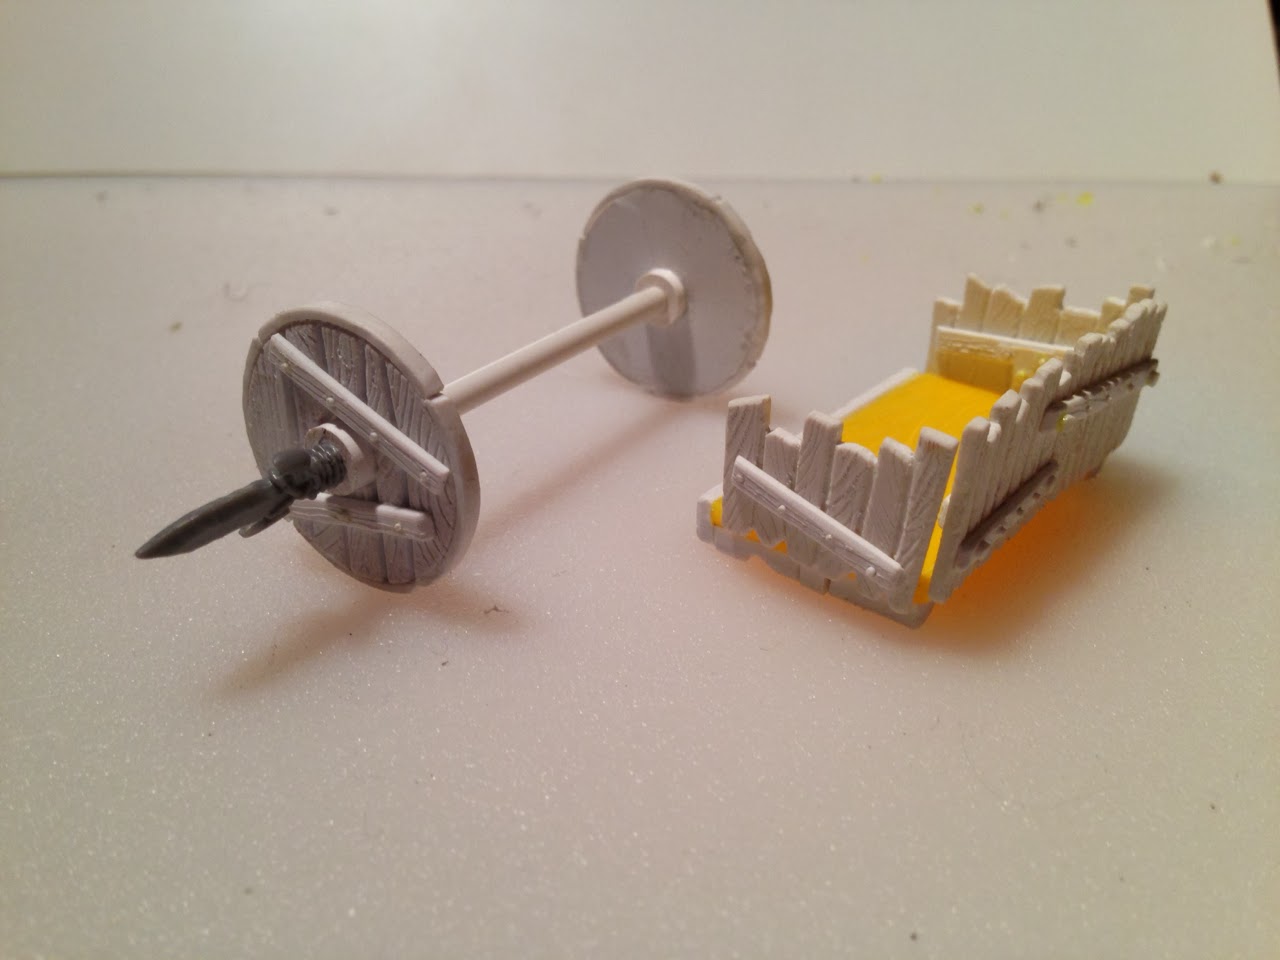
I spent a good long while trying to figure out the best way to glue the sides and front to the base of the chariot. I had cut guide channels and used some plastic strip to provide a surface on which to glue, but it didn't all line up quite as well as I'd hoped. I considered flipping the panels around and putting them on backwards, but then I didn't think it would leave enough space for the crew. I ended up just going with it as planned, and I will add various bits and gubbins to cover up the gaps (like maybe a banner pole and extra shields.


I assembled the chariot axle and I thought it was a good length that gave me a little slack when I mocked everything up with white-tac. But once I got it all together, I found that the axle was a little short, if anything. Now that the side panels were glued on, they stuck out farther than expected and hit the wheels. This gave me an opportunity to play with my new rod stock cutting jig, about which I will post later in the week. I cut an extra bit of round tube to compensate, which made the wheels match each other anyway. I also used some orc spear tips as wheel blades. Looks great, I think and very orcy (gobliny?).


So with it all assembled, I couldn't wait to stick some wolf riders in it to get a sense for how it will look (see above). I am really quite pleased with it so far. The next step will be to work on the yoke for the wolves, so I placed it on a chariot base to get an idea of how long that needed to be and I found this situation.


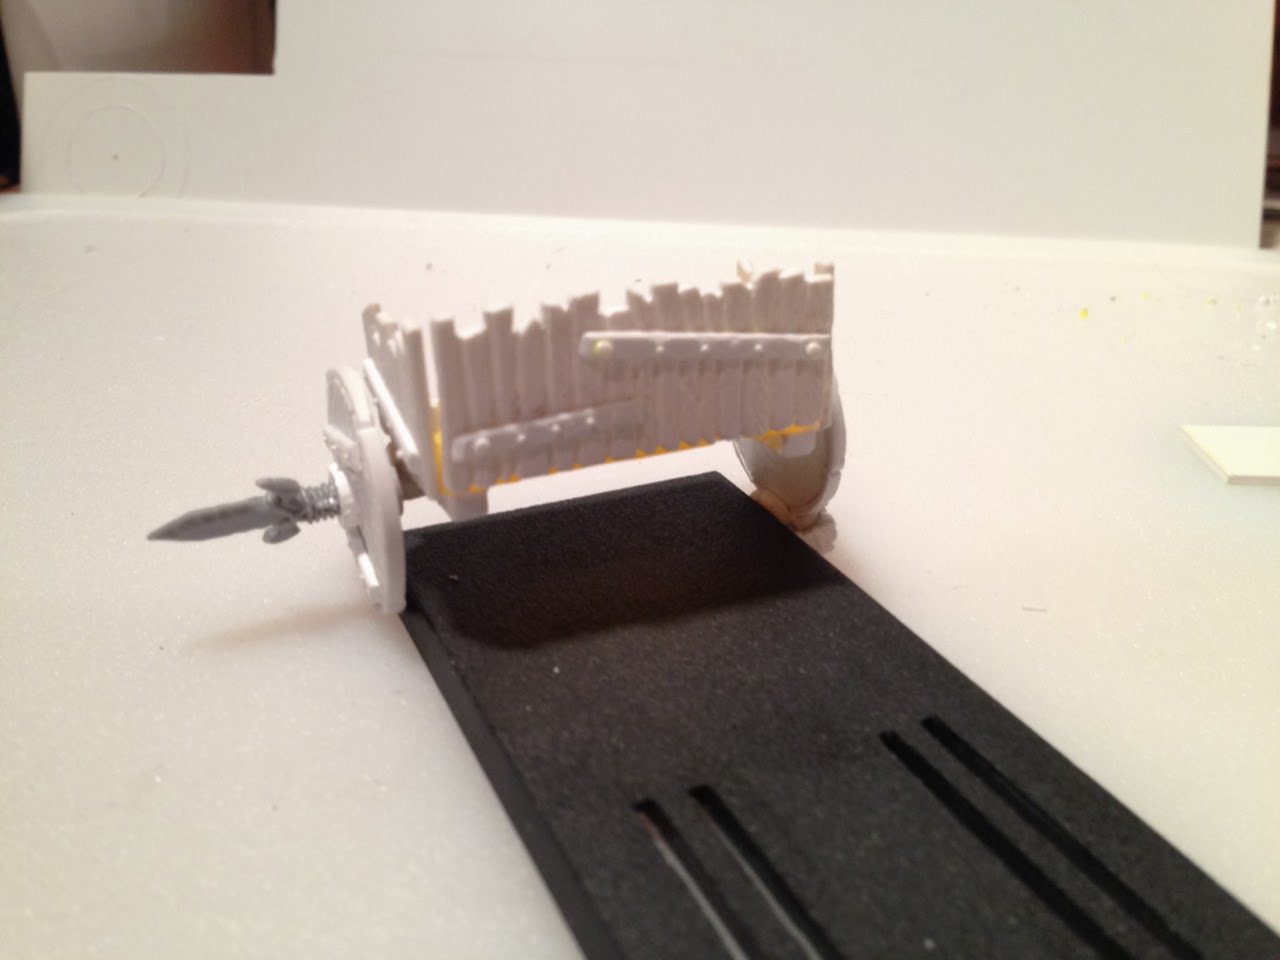
Bah. No plan survives contact with the chariot base. The way I see it, I have two options. I can put some rocks or something on the base that stick out and the wheels can perch on that. Or, I could expand the base and make it a three wolf chariot. That has a certain appeal, although it will require modifying my original idea for the wolves. However, I think if what I have in mind works, it will look very unique. Maybe I can even use the model for a character as it will be quite large at that point.

I'm going out today to get the wolves (hopefully - the local GW store has been out for a while) so if I can get them, that should help me decide.


Sunday, February 9, 2014

Scratch Built Goblin Chariot Part 1

I've been working (slowly) on my scratch built goblin chariot. I looked around and wasn't very happy with the availability of models for the gobbos - I don't really like the Grom the Paunch version, and I wasn't very keen on working with a huge FineCast model with lots of fiddly bits. So, I did what any self-respecting warhams modeler would do and decided to scratch build one!

After researching methods for working with sheet styrene, I ran across a tutorial for making wooden cart out of styrene for casting (here). Using these methods should work fine for a chariot!

I started with a plastic door from a Monsters Inc. toy I had laying around and cut the panels out of it to form the floor of the chariot. I figured it would be easier to get a solid platform and some initial tests I did showed that it would glue to styrene with plastic glue. This turned out to be incorrect, and I later found I would need to use super glue. It would have been easier to carve a floor it turns out and it would assemble easier. Also, I found out as I worked that it would have been better to start with a frame rather than the paneling. That way I could have fit the panels to the frame rather than vice versa. Anyway, I'm getting ahead of myself.

 Carving the front and sides was easier than I thought, and it was actually pretty fun.

Starting with a strip of styrene, I carved deep lines to represent boards. Then with a scribing tool, I drew in wood grain patterns. Alternating between cleaning up the deep lines and the wood grain, I ended up with a decent pattern. Then, I cut the ends to represent the roughshod nature of Goblin construction. The nice thing is that I never had to be very straight or accurate. These are Gobins building it!


Then I did a smiler treatment with some thin strip for the supporting braces, and cut some thin rod to represent bolts, nails, or whatever.


Those red spots are blood. I also found out exactly how sharp my Exacto blades were! I didn't even know I got myself until I saw the spots on the plastic. Seems to always happen with I'm working on Goblins, the little blighters.

Here is a mockup held together with white-tac to give an idea of what it will look like when it's glued together.


I used the same technique for the wheels, although that would turn out to be a little more involved. I took a series of pictures for a tutorial for that. I shall write it up soon.


Wednesday, February 5, 2014

Fallen through the warp

So, this blog hasn't seen any action in quite some time. I think we need to change that. Although I haven't done very much model work due to some changes in life (moved, new job, etc.) I have recently started to to get the bug to build little plastic mans again.

Right now I'm just getting set up and resettled into this blog, but here's a little taste of what I've started doing for my Warhammer Fantasy Orcs and Goblins.